
The most common form of interaction in an online course is through discussions started by an instructor. Participation and interaction in discussions don’t occur naturally. You must intentionally design it into your courses. To encourage engaging, quality discussion, craft discussion questions carefully and create inquiry.
Develop Successful Online Discussions
Help your students feel comfortable and provide them with guidelines as they begin to participate in discussions. Here are four general steps to developing successful online discussions to help build community and fulfill assignments:
- Define participation requirements.
- Share your expectations. Create a discussion where students can read about etiquette and access grading information.
Model proper online interaction and reinforce appropriate behavior with public recognition.
- Share your expectations. Create a discussion where students can read about etiquette and access grading information.
- Craft an effective question.
- Incorporate multimedia resources into your questions to reduce the monotony of purely text-based interactions. With the popularity of services like YouTube™, you can ask students to view a clip and ask for responses.
- Encourage new ideas.
- If discussion posts contain too much agreement and not enough questioning of ideas, assign students with the last names A-M to support one side and N-Z to support the other.
- Moderate.
- Establish your presence. Ask for clarification, resources, or input from silent participants.
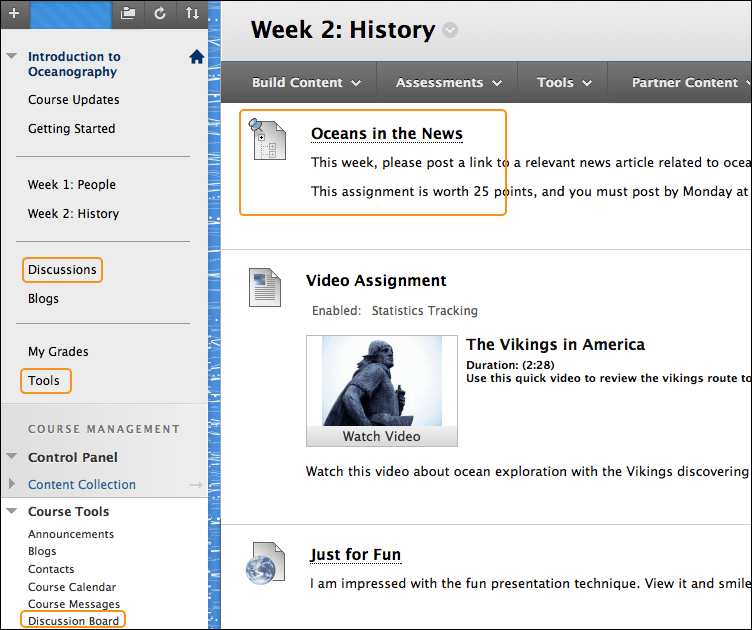
You can allow users to access discussions in several ways. You can add a customized link to the course menu and to a course area. When you provide a link to discussions in a course area, students can access the tool alongside other course content. As an instructor, on the Control Panel, expand the Course Tools section and select Discussion Board. From this link, access the course discussion board and the group discussion boards for the groups in your course.
Add a Discussion Link on the Course Menu
You can include a link on the course menu for instant access to the discussions tool. You can also customize the name of the link.
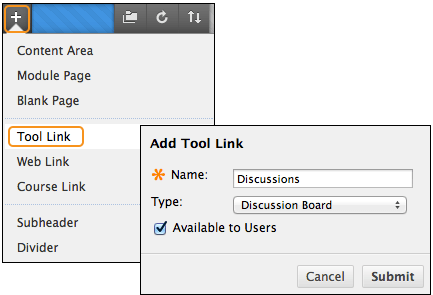
- Select the Add Menu Item icon above the course menu to access the menu.
- Select Tool Link.
- Type a Name for the link.
- From the Type menu, select Discussion Board.
- Select the Available to Users check box.
- Select Submit.
The new tool link appears last in the course menu list. Press and drag the arrows icon to move the link into a new position. In the link’s menu, you can rename, delete, or hide the link from students.
Add a Discussion Link in a Course Area
You can incorporate the discussion board into course areas, allowing students to access the tool alongside content. In a content area, add a forum link following lecture notes to gather questions on the material presented or after an assignment to gather students’ perceptions of how they did. You can add adaptive release rules or date availability restrictions to limit students’ access. Then, students access content in a specified order, such as reading a PDF before they add posts to the discussion board.
- Access the content area or folder where you want to link to the discussion board or forum.
- Access the Tools menu and select Discussion Board.
- From here, you have three options:
- On the Create Link: Discussion Board page, select the Link to Discussion Board Page option to link to the discussion board itself.
- Use Select a Discussion Board Forum and select a forum from the list.
- Select Create New Forum to add a link to a forum you create at this time. You select all forum settings at the time of creation. The newly created forum appears in the list of forums to choose from when adding the link in your course.
- Select Next.
- On the next Create Link: Discussion Board page, type a Link Name. The Link Name can’t exceed 50 characters.
- Optionally, type instructions or a description in the Text box.
- For the Available option, select Yes.
- To enable tracking, select Yes. The system will record the number of times the link is viewed, when it’s viewed, and by whom.
- Select the Display After and Display Until check boxes to enable the date and time selections. Display restrictions affect the visibility of the discussion board or forum.
- Select Submit. The discussion link appears in the course area.